This post is also available in:
![]() Türkçe (Turkish)
Türkçe (Turkish)
- System Functions
- SAP1024B INIT Function
- SAP1024B STATUS Function
- SAP1024B SEND COMMAND Function
- SAP1024B WRITE DATA Function
- SAP1024B READ DATA Function
- SAP1024 GRAPHIC ADDRESS POINTER POSITIONING Function
- SAP1024 LCD GRAPHICS CLEAR Function
- SAP1024 LCD TEXT CLEAR Function
- SAP1024 LCD CLEAR Function
- SAP1024 CURSOR POSITION Function
- Visual Functions
- SAP1024_WRITE_CHARACTER Function
- SAP1024_WRITE_TEXT Function
- SAP1024_LCD_ADVANCED_TEXT Function
- SAP1024_LCD_DISPLAY_IMAGE Function
- SAP1024_LCD_DISPLAY_ICON Function
- SAP1024_PIXEL Function
- SAP1024 DRAW_LINE Function
- SAP1024 DRAW_RECTANGLE Function
- SAP1024 DRAW_ROUNDED_RECTANGLE Function
- SAP1024 DRAW_CIRCLE Function
- SAP1024 DRAW_TRIANGLE Function
- Library
Using the SAP1024B Screen Library
In this section, all the functions provided in the library will be explained one by one.
Important Notes:
- The library has been tested only on 240×120 GLCD screens, but its flexible design allows it to work with other screen sizes as well.
- SAP1024B is essentially a clone of the T6963C GLCD controller, so this library is fully compatible with T6963C-based modules.
- The library offers extensive support for GLCD text functions in MikroC.
- It has been specially optimized for users developing PIC18-based GLCD applications.
- The built-in graphic functions make it possible to draw shapes, icons, and figures directly on the screen.
PIN DEFINITIONS
In order for the functions in the library to communicate with and control the GLCD screen, some microcontroller ports must be configured and connected accordingly.
You can review the diagram below for the correct pin settings of the GLCD screen using MikroC.
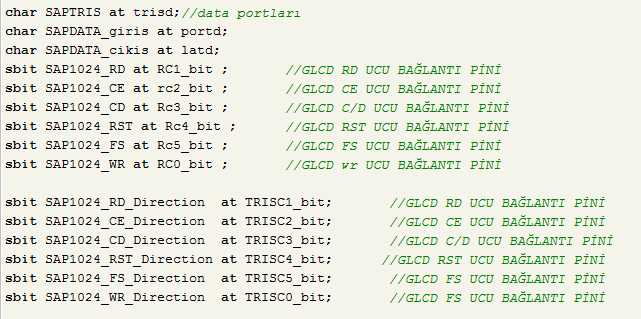
- “SAPTRIS” represents the data ports. When connecting the GLCD, all data lines must be connected sequentially to the same port.
In the example, they are connected to PORT-D, so the definition is written as “trisd” - “SAPDATA_giris” and “SAPDATA_cikis” also represent data pins connected to PORT-D, and are defined as “portd” and “latd” respectively.
- “SAP1024_RD”, “SAP1024_CE”, “SAP1024_CD”, “SAP1024_RST”, “SAP1024_FS”, and “SAP1024_WR” are control pins on the GLCD RST reset – FS is the function select pin
1 – SYSTEM FUNCTIONS
1A) SAP1024_INIT Function
Purpose:
The SAP1024_INIT function gathers all necessary parameters about the connected GLCD and calculates the required internal variables.These calculated values are used by other functions in later processes. This function must be declared first before any other GLCD operations.
Usage:
SAP1024_INIT(screen_width, screen_height, font)
This function is called as shown above. It takes three arguments named screen_width, screen_height, and font.
screen_width: Specifies the width of the GLCD to be used
screen_height: Specifies the height of the GLCD
font: Specifies the font size to be used. There are two options: “6” indicates narrow font, “8” indicates wide font
Example:
SAP1024_INIT (240,128,8) -> In this example, we initialize a 240×128 GLCD using the wide font option.
1B-) SAP1024_STATUS Function
Purpose:
Checks whether the GLCD processor is busy. If busy, it enters a loop and continues checking until the processor becomes free.
Usage:
This function does not take any parameters and performs no external operations.
It is generally used inside command and data write functions to ensure the processor is ready before sending data.
1C) SAP1024_KOMUT_GONDER (Send Command) Function
Purpose:
Allows the user to send specific commands to the GLCD.
Usage:
SAP1024_KOMUT_GONDER( command )
command: Refers to predefined instructions supported by the GLCD controller. The complete list of available commands is provided below. These commands are matched internally to corresponding register values.
Command List
Note: Some commands may appear similar. This is because GLCDs are typically divided into TEXT and GRAPHIC sections. Therefore, certain commands exist separately for each section, while some control both.
— Display Mode Commands:
- DISPLAY_OFF – Disables screen display, but the GLCD continues running in the background
- TEXT_CURSOR_OFF – Hides the text cursor
- TEXT_CURSOR_ON_BLINK_OFF – Shows the text cursor without blinking
- TEXT_CURSOR_ON_BLINK_ON – Shows the text cursor with blinking
- GRAPHIC_CURSOR_OFF – Hides the graphic cursor
- GRAPHIC_CURSOR_ON_BLINK_OFF – Graphic cursor is visible but does not blink
- GRAPHIC_CURSOR_ON_BLINK_ON – Graphic cursor is visible and blinks
- TEXT_GRAPHIC_CURSOR_OFF – Disables both text and graphic cursors
- TEXT_GRAPHIC_CURSOR_ON_BLINK_OFF – Text & graphic cursors are shown but do not blink
- TEXT_GRAPHIC_CURSOR_ON_BLINK_ON – Text & graphic cursors are shown and blink
— Cursor Pattern Commands:
- BIR_CIZGILI_IMLEC – Sets the cursor thickness to 1 pixel (single-line cursor)
- IKI_CIZGILI_IMLEC – Sets the cursor thickness to 2 pixels
- UC_CIZGILI_IMLEC – Sets the cursor thickness to 3 pixels
- DORT_CIZGILI_IMLEC – Sets the cursor thickness to 4 pixels
- BES_CIZGILI_IMLEC – Sets the cursor thickness to 5 pixels
- ALTI_CIZGILI_IMLEC – Sets the cursor thickness to 6 pixels
- YEDI_CIZGILI_IMLEC – Sets the cursor thickness to 7 pixels
- SEKIZ_CIZGILI_IMLEC – Sets the cursor thickness to 8 pixels
— Mode Set Commands:
- OR_MODE_CGROM
- EXOR_MODE_CGROM
- AND_MODE_CGROM
- TEXT_ATTRIBUTE_MODE_CGROM
- OR_MODE_CGRAM
- EXOR_MODE_CGRAM
- AND_MODE_CGRAM
- TEXT_ATTRIBUTE_MODE_CGRAM
— Set Control Commands:
- CURSOR_POINTER_SET
- SET_OFFSET_REGISTER
- SET_ADDRESS_POINTER
- SET_TEXT_HOME_ADDRESS
- SET_TEXT_AREA
- SET_GRAPHIC_HOME_ADDRESS
- SET_GRAPHIC_AREA
— Data Write and Read Commands:
- DATA_AUTO_WRITE
- DATA_AUTO_READ
- RESET_AUTO_READ_WRITE
- DATA_WRITE_INCREMENT_ADD
- DATA_READ_INCREMENT_ADD
- DATA_WRITE_DECREMENT_ADD
- DATA_READ_DECREMENT_ADD
- DATA_WRITE_KEEP_ADD
- DATA_READ_KEEP_ADD
— Other Commands:
- SCREEN_PEAK
- SCREEN_COPY
Example:
SAP1024_KOMUT_GONDER(DISPLAY_OFF) – In this example, the display-off command is issued.
The screen does not show any content, but continues to run in the background.
1D-) SAP1024_DATA_YAZ Function
Purpose:
Writes an 8-bit data value to the GLCD.
Usage:
SAP1024_DATA_YAZ(data)
data: Represents an 8-bit value to be sent.
Example:
SAP1024_DATA_YAZ(0b10000001) – In this example, the data is sent in binary format.
The same operation can be performed using decimal or hexadecimal notation as well.
1E-) SAP1024_DATA_OKU Function
Purpose:
Reads the data from the current position of the GLCD pointer and returns its value.
Usage:
SAP1024_DATA_OKU() – Takes no parameters.
1F-) SAP1024_GRAFIK_ADRES_POINTER_KONUMLANDIRMA Function
Purpose:
Sets the position of the pointer in the graphic memory.
Usage:
NOTE: The top-left corner is considered as x = 0, y = 0. Negative values are not allowed.
SAP1024_GRAFIK_ADRES_POINTER_KONUMLANDIRMA(x, y)
x: Horizontal position (X-axis)
y: Vertical position (Y-axis)
Example:
SAP1024_GRAFIK_ADRES_POINTER_KONUMLANDIRMA(10, 5) – This sets the pointer at coordinates x = 10 and y = 5 on the screen.
1G-) SAP1024_LCD_GRAFIK_TEMIZLE Function
Purpose:
Clears the graphic memory. All graphical content except text will be removed.
Usage:
SAP1024_LCD_GRAFIK_TEMIZLE() – Takes no parameters.
1H-) SAP1024_LCD_TEXT_TEMIZLE Function
Purpose:
Clears the text memory. Graphically drawn text is not affected.
Usage:
SAP1024_LCD_TEXT_TEMIZLE() – Takes no parameters.
1I-) SAP1024_LCD_TEMIZLE Function
Purpose:
Clears all text and graphic content from the screen simultaneously.
Usage:
SAP1024_LCD_TEMIZLE() – Takes no parameters.
1J-) SAP1024_CURSOR_POZIZYON Function
Purpose:
Sets the position of the text cursor.
Usage:
SAP1024_CURSOR_POZIZYON(x, y)
x: Horizontal position on the screen
y: Vertical position on the screen
Example:
SAP1024_CURSOR_POZIZYON(0, 0) – This places the cursor at the top-left corner of the screen.
2- VISUAL FUNCTIONS
2A-) SAP1024_KARAKTER_YAZMA Function
Purpose:
Writes a single character to the GLCD screen.
Usage:
SAP1024_KARAKTER_YAZMA(karakter)
The character must be a single character string enclosed ' 'in single quotes.
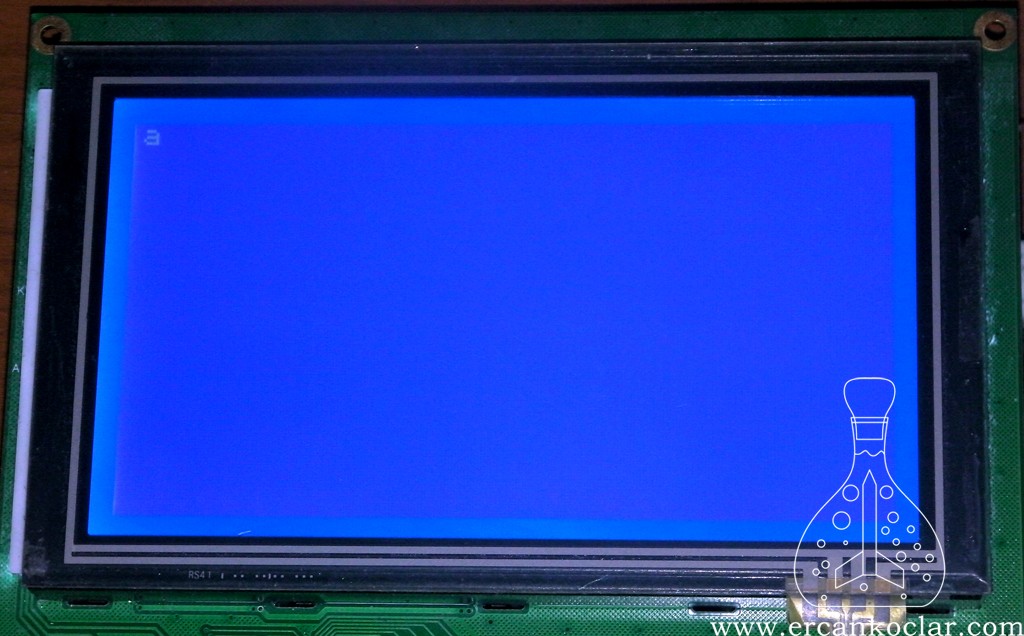
Example:
SAP1024_KARAKTER_YAZMA(‘a’) – This command writes the letter “a” on the screen.
2B-) SAP1024_YAZI_YAZMA Function
Purpose:
Writes a word or sentence on the GLCD screen at the desired coordinates using the fixed-size font stored in the internal ROM.
Usage:
SAP1024_YAZI_YAZMA(sutun_X, satir_Y, yazi)
- sutun_X: Starting X position of the text
- satir_Y: Starting Y position of the text
- yazi: The string to be written (pointer, so no length limit)
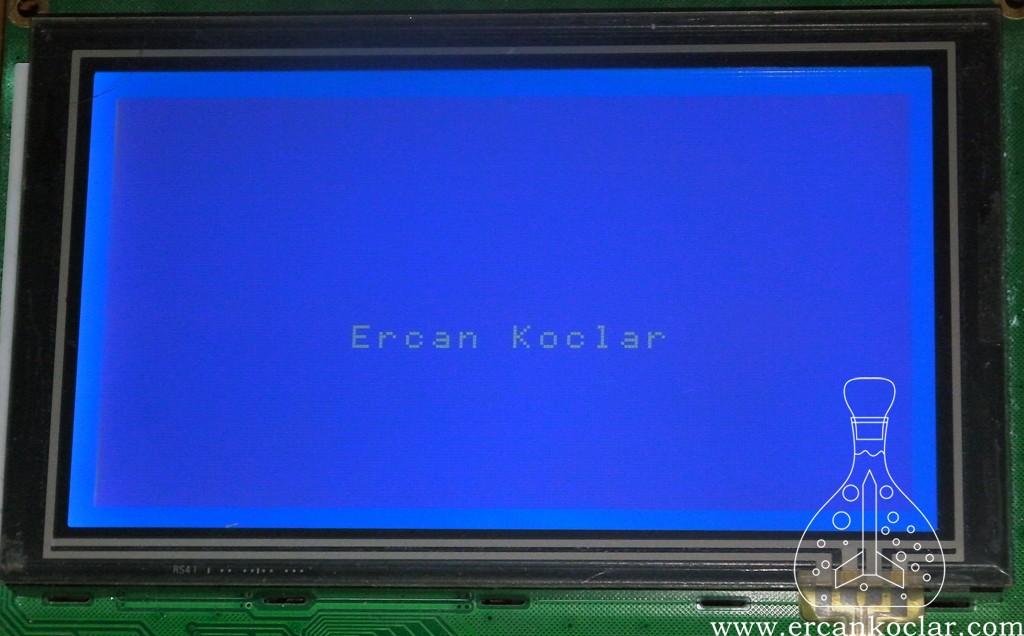
Example:
SAP1024_YAZI_YAZMA(10, 10, “Ercan Koclar”) – This writes the text “Ercan Koclar” at column 10, row 10.
2C-) SAP1024_LCD_GELISMIS_YAZI Function
Purpose:
This is an advanced text writing function. It allows adjusting the size, spacing, and inversion (invert) of texts by using external fonts. A font named standart is predefined within the library.
Usage:
SAP1024_LCD_GELISMIS_YAZI(pozisyon_x, pozisyon_y, yazi, font, olcek, bosluk, invert)
- pozisyon_x: X coordinate of the text
- pozisyon_y: Y coordinate of the text
- yazi: The text to be written (pointer)
- font: Name of the font to be used. For example:
standart - olcek: Text scale (size)
- bosluk: Space between characters. At high values, characters may overlap.
- invert: Set to 1 to invert the colors. Default: 0
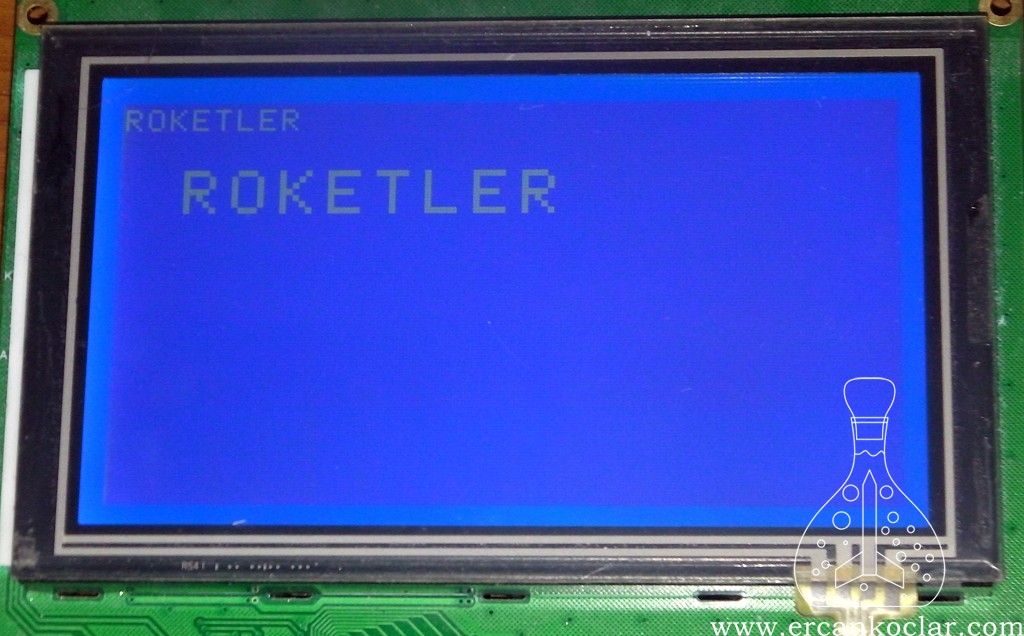
Example:
SAP1024_LCD_GELISMIS_YAZI(1, 1, “ROKETLER”, standart, 1, 1, 0) – Writes “ROKETLER” at position 1×1 with scale 1
SAP1024_LCD_GELISMIS_YAZI(20, 20, “ROKETLER”, standart, 2, 1, 0) – Same text, enlarged by scale of 2
2D-) SAP1024_LCD_RESIM_BAS Function
Purpose:
This function is used to print a full-screen black-and-white (1-bit) image to the GLCD screen.
Note: The image must be resized according to the screen resolution and converted to black and white. After this process, the image is converted into code. Recommended tool: LCDAssistant
Usage:
SAP1024_LCD_RESIM_BAS(veri, invert)
- veri: Resmin kod dizisini temsil eder. Örnek:
ben_kimim - invert: Inverts the image by turning all bits with value 1 to 0, and all bits with value 0 to 1.
You can examine the implementation by downloading and inspecting the ben_kimim.h file.
Example:
SAP1024_LCD_RESIM_BAS(ben_kimim, 1) – Prints the image to the screen in inverted form


2E-) SAP1024_LCD_SIMGE_BAS Function
Purpose:
This function is used specifically for menu designs instead of full-screen image display.
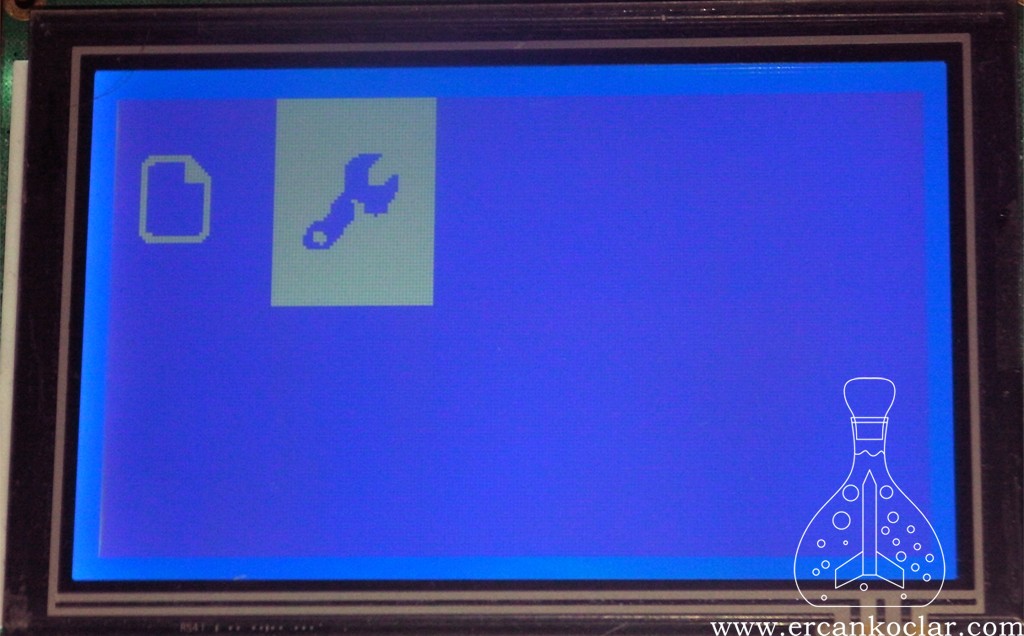
You can convert small icon images into arrays and place them in the desired area of the screen, displaying them independently from other content.
For example, when a button icon is shown, only that icon is affected; other parts of the screen remain unchanged. This structure is highly ideal for using dynamic icons in menus.
You can resize any icon you find on the internet and convert it to 1-bit format for use.
Usage:
SAP1024_LCD_SIMGE_BAS(pozisyon_x, pozisyon_y, veri, genislik_pixel, yukseklik_pixel, invert)
- pozisyon_x: The horizontal (x) starting position of the icon on the screen
- pozisyon_y: The vertical (y) starting position of the icon on the screen
- veri: The name of the data array representing the icon
- genislik_pixel: Width of the icon in pixels
- yukseklik_pixel: Height of the icon in pixels
- invert: If set to 1, colors are inverted. This can be used to indicate, for example, a button being clicked.
Note: You can download and inspect 1-bit icon .h files from the following links: 1.h, 2.h
Example:
![]()
![]() In the example below, there are two independent 1-bit icons:
In the example below, there are two independent 1-bit icons:
- SAP1024_LCD_SIMGE_BAS(0, 0, simge1, 40, 56, 0) — Icon is displayed normally (not inverted)
- SAP1024_LCD_SIMGE_BAS(50, 0, simge2, 49, 59, 1) — Icon is displayed normally (not inverted)
2F-) SAP1024_PIXEL Function
Purpose:
This basic drawing function activates or clears a single pixel at the specified position. It is useful for graphical displays, diagrams, or interactive whiteboard applications.
Usage:
SAP1024_PIXEL(pozisyon_x, pozisyon_y, renk) şeklindedir.
– pozisyon_x: Horizontal (x-axis) coordinate of the pixel
– pozisyon_y: Vertical (y-axis) coordinate of the pixel
– renk: If 1, the pixel is turned on (white); if 0, the pixel is cleared (black)
Example:
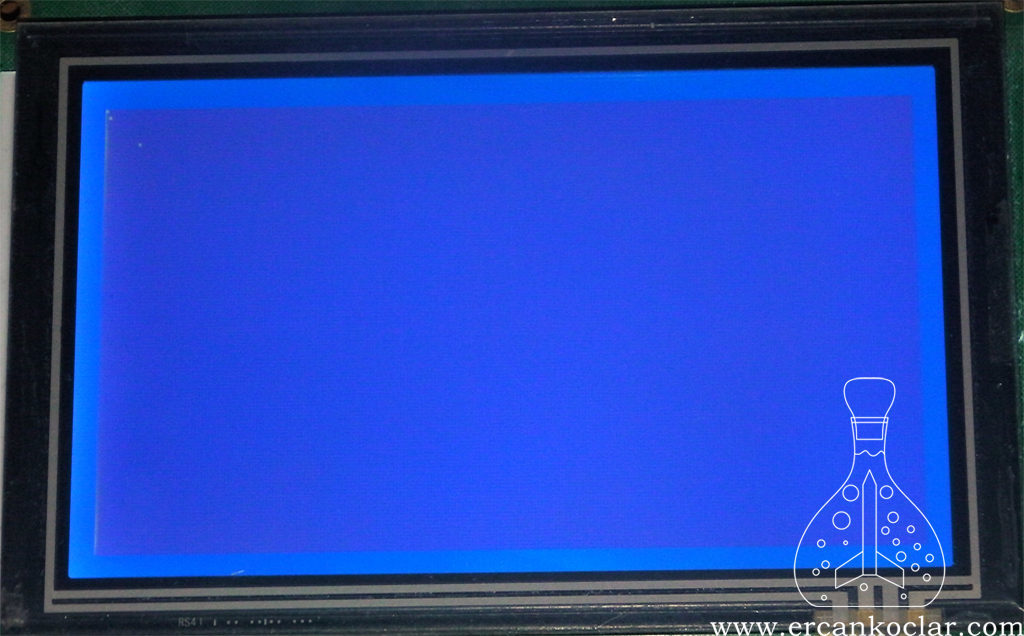
SAP1024_PIXEL(0, 0, 1)
SAP1024_PIXEL(10, 10, 1)
SAP1024_PIXEL(1, 2, 1) – This example draws a pixel at three different points.
2G-) SAP1024_CIZGI Function
Purpose:
This function draws a straight line of specified thickness between two points. It is especially useful in graphical applications like clock displays.
Usage:
SAP1024_CIZGI(pozisyon_x0, pozisyon_y0, pozisyon_x1, pozisyon_y1, kalinlik, renk)
– pozisyon_x0: X coordinate of the starting point
– pozisyon_y0: Y coordinate of the starting point
– pozisyon_x1: X coordinate of the ending point
– pozisyon_y1: Y coordinate of the ending point
– kalinlik: Line thickness (higher value = thicker line)
– renk: If set to 1, the line is visible; if set to 0, the line is inverted (used for erasing or effects)
Example:
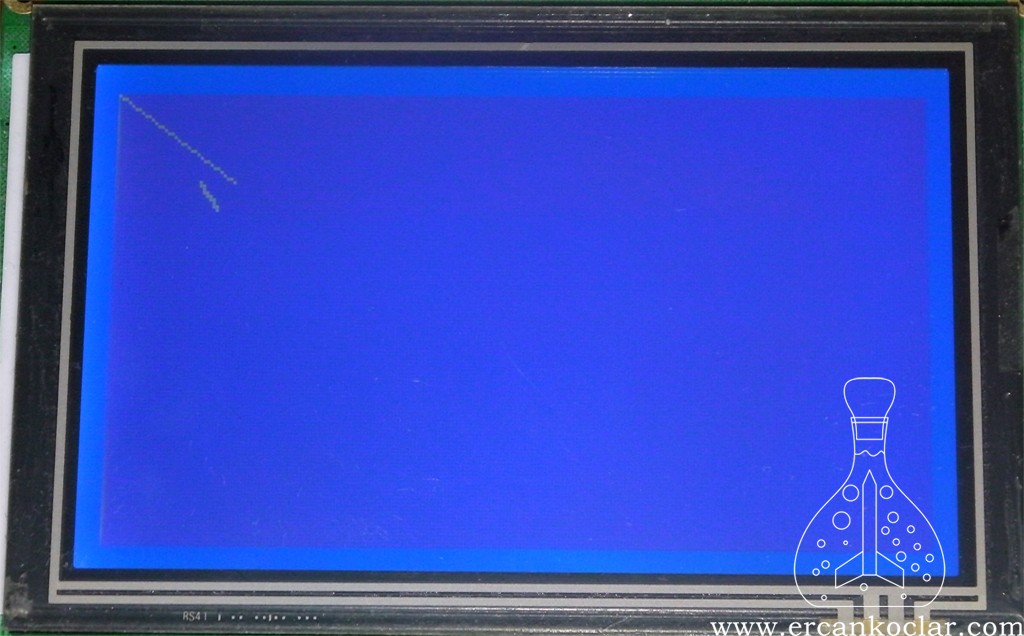
SAP1024_CIZGI(0, 0, 35, 25, 1, 1)
SAP1024_CIZGI(25, 25, 30, 32, 2, 1)
2H-) SAP1024_DORTGEN Function
Purpose:
This function is used to draw squares or rectangles (rectangular frames) with specified thickness and dimensions.
Usage:
SAP1024_DORTGEN(pozisyon_x0, pozisyon_y0, pozisyon_x1, pozisyon_y1, kalinlik, renk)
– pozisyon_x0: X coordinate of the first corner
– pozisyon_y0: Y coordinate of the first corner
– pozisyon_x1: X coordinate of the opposite corner
– pozisyon_y1: Y coordinate of the opposite corner
– kalinlik: Specifies the line thickness
– renk: If 1, the shape is drawn normally; if 0, the shape is drawn inverted (colors flipped)
Example:
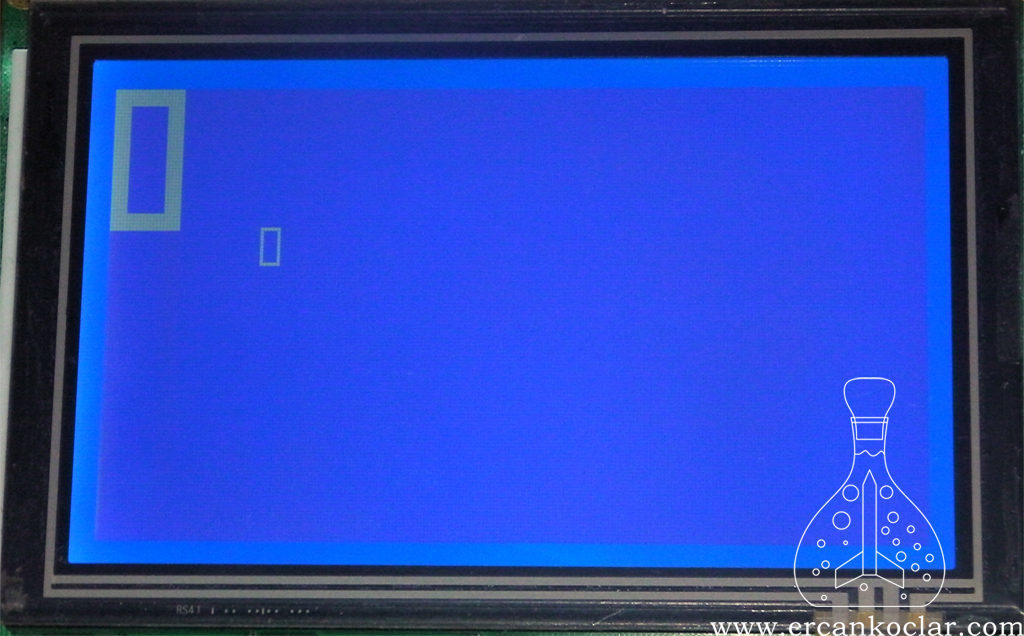
SAP1024_DORTGEN(0, 0, 20, 40, 5, 1) – This draws a rectangle with thickness 5.
SAP1024_DORTGEN(50, 50, 45, 40, 1, 1)
2İ-) SAP1024_DORTGEN_RADUS (Rounded Rectangle) Function
Purpose:
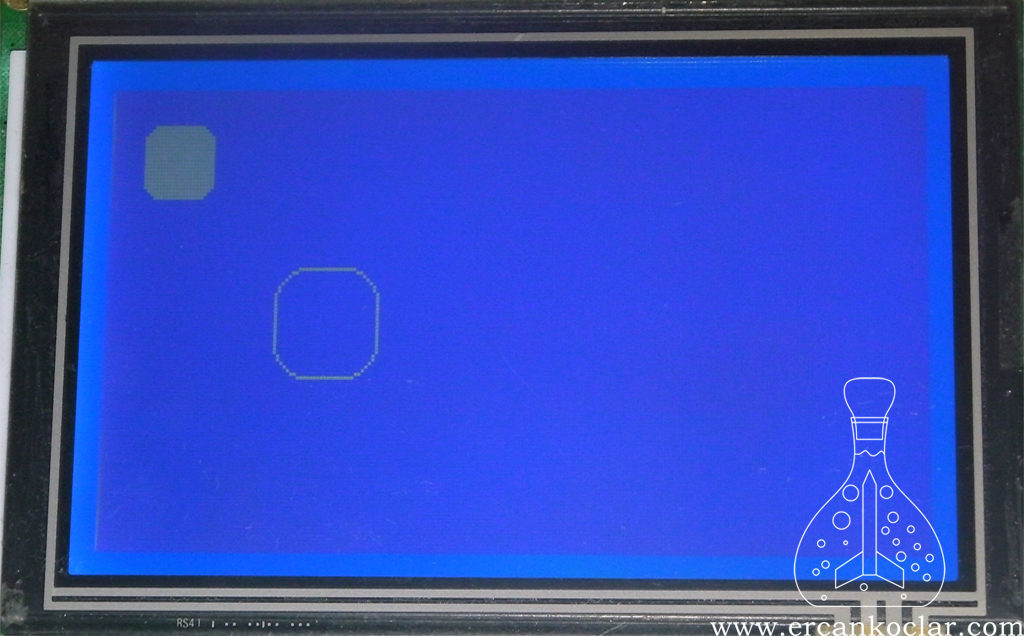
This function works similarly to the normal rectangle drawing function but allows rounding at the corners (radius). It is ideal for designs where smooth, rounded corners are desired.
Usage:
SAP1024_DORTGEN_RADUS(pozisyon_x0, pozisyon_y0, pozisyon_x1, pozisyon_y1, r, dolu, renk)
Note: All other parameters are the same as in the SAP1024_DORTGEN function.
– r: Corner rounding radius
– dolu: If 1, draws a filled shape; if 0, draws only the outline
– renk: 1 for visible drawing, 0 for inverted (reversed color) drawing
Example:
SAP1024_DORTGEN_RADUS(10, 10, 30, 30, 5, 1, 1)
SAP1024_DORTGEN_RADUS(50, 50, 80, 80, 10, 0, 1)
2J-) SAP1024_CEMBER Function
Purpose:
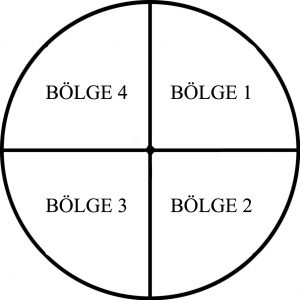
This function draws a circle with a given radius r from the center point (x, y).
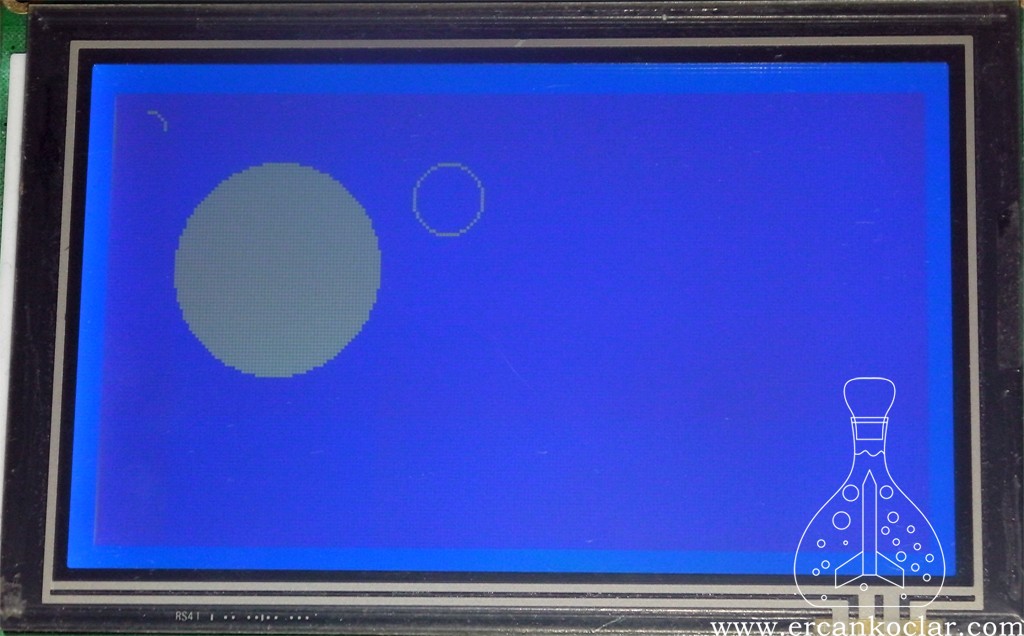
The region parameter defines which part of the circle to draw (each region is 90°). If set to 0, a full circle is drawn.
Usage:
SAP1024_CEMBER(pozisyon_x, pozisyon_y, r, dolu, bolge, renk)
– pozisyon_x: X coordinate of the center
– pozisyon_y: Y coordinate of the center
– r: Radius of the circle
– dolu: 1 for a filled circle, 0 for an outline
– bolge: 0 draws the full circle, other values draw specific sections (e.g., semicircle)
– renk: 1 ise görünür, 0 yapılırsa invert (ters) çizilir
Example:
SAP1024_CEMBER(50, 50, 30, 1, 0, 1)
SAP1024_CEMBER(100, 30, 10, 1, 0, 1)
SAP1024_CEMBER(10, 10, 5, 0, 1, 1) – In this example, only the first quadrant of the circle is drawn.
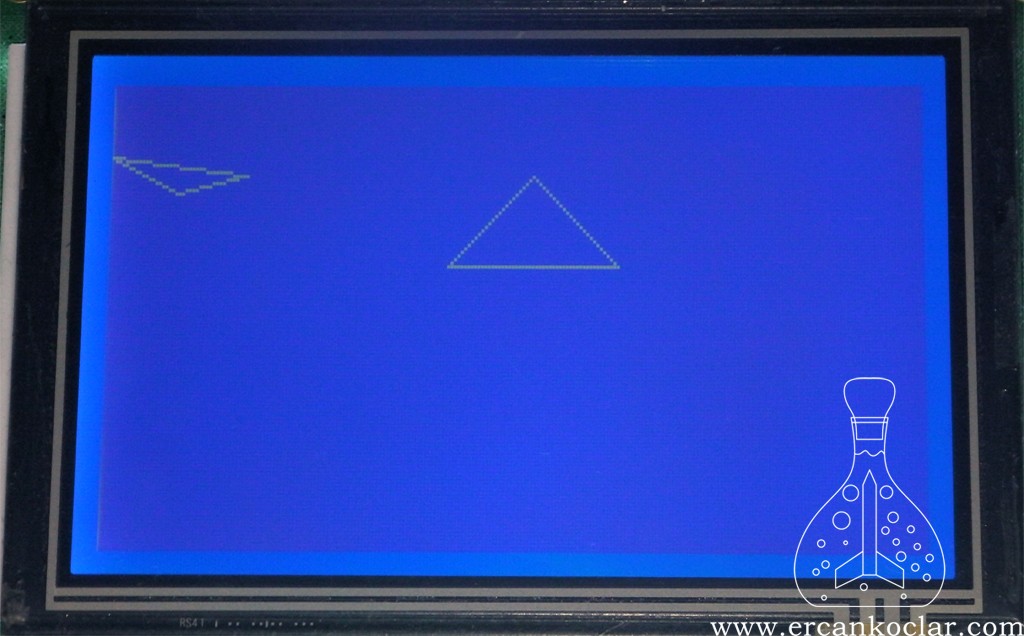
2K-) SAP1024_UCGEN Function
Purpose:
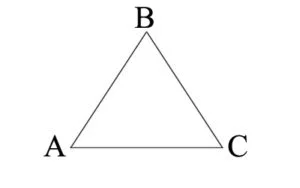
A triangle can be drawn by specifying the (x, y) coordinates of three different points.
Usage:
The positioning of the triangle is illustrated in the following image:
2K-) SAP1024_UCGEN Function
Purpose:
This function allows drawing a triangle by entering the coordinates of three distinct points.
Usage:
SAP1024_UCGEN(ax, bx, cx, ay, by, cy, renk)
– ax: X coordinate of point A
– bx: X coordinate of point B
– cx: X coordinate of point C
– ay: Y coordinate of point A
– by: Y coordinate of point A
– cy: Y coordinate of point C
– renk: If set to 1, the triangle is drawn normally; if set to 0, it is drawn inverted
Example:
SAP1024_UCGEN(0, 40, 20, 20, 25, 30, 1)
SAP1024_UCGEN(100, 150, 125, 50, 50, 25, 1)
In this article, we have covered the usage of the SAP1024B screen library for GLCD displays in detail.
In this article, we have covered the usage of the SAP1024B screen library for GLCD displays in detail.
In this article, we have covered the usage of the SAP1024B screen library for GLCD displays in detail.
By using the SAP1024B screen library in your project, you can build advanced graphical interfaces.
“GLCD LIBRARY USAGE” VIDEO TUTORIAL
Required Files
This post is also available in:
![]() Türkçe (Turkish)
Türkçe (Turkish)
